Arduino Voltage Measurements
An Arduino Building Block
Many of the sensors used with an Arduino provide their output with an voltage that is between 0 and 5 volts. Accurate and reliable measurement and interpretation of this voltage is fundamental to making use of these sensors.
The articles listed below are some of the guides and tutorials that I have authored to get you more familiar with these voltage measurements and with the voltage measurement devices.
A Simple Voltmeter
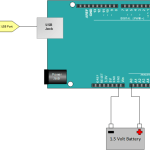
This tutorial gets you started without a lot of fluff. You will be making your own voltage measurement and displaying it on your Arduino Serial Monitor quickly.
READ THIS ARTICLEArduino Resolution and Accuracy
Is your voltage measurement accurate enough? Do you have a enough resolution? This article will help to gain a basic understanding of what the Arduino voltage measurement can and can not do.
READ THIS ARTICLEMeasurements Up to 25V
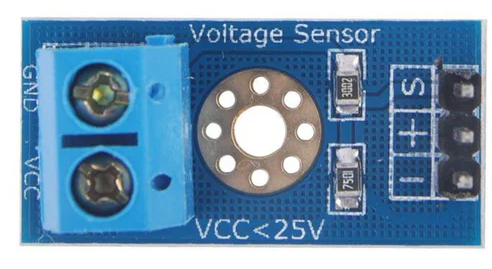
The Arduino can only measure voltage up to 5 volts dc. This article introduces a simple voltage measurement module that can allow you to make measurements up to 25V dc.
READ THIS ARTICLELTC2400 - Lots of Resolution
This LTC2400 Voltmeter Module is easy to use and will allow you to make very accurate voltmeter measurements on your Arduino.
Includes schematics, drawings and specifications.
READ THIS ARTICLELM4040 Voltage Reference Breakout Tutorial
Default voltage measurements using your Arduino use the supply voltage as a reference.
The result is that you have a measurement that has a lot to be desired in terms of accuracy.
One way to improve this is to use an external reference. The TI LM4040 is a reference that boasts a one percent accuracy and works beautifully with your Arduino
READ THIS ARTICLEPCF8591 Arduino Voltage Measurement Tutorial
The PCF8591 is a very versatile device that not only allows us to make a basic voltage measurements, but allows for analog outputs and differential measurements as well.
This tutorial is more of a quick start in that it shows how to connect the PCF8591 for communication and to make a simple voltage measurement.
READ THIS ARTICLEPCF8591 Differential Voltage Measurements
What if you want to measure the voltage across a resistor somewhere in your circuit and neither side of the resistor is at ground potential.
Doing it with the Arduino directly is difficult to do.
Doing it with a PCF8591 in a differential measurement mode may get the job done. This tutorial will show you how its done.
READ THIS ARTICLEPCF8591 Arduino Digital to Analog Conversion Tutorial

Since we're talking about the PCF8591... Ever wanted to control an output voltage?
One way to do that with an Arduino is to use a digital to analog converter.
The PCF8591 includes an 8 bit analog to digital converter. This tutorial will show you how to put that converter to use.
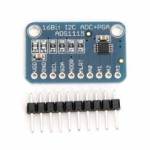
READ THIS ARTICLEADS1115 16 Bit ADC Tutorial: Getting Started
Want to improve your measurement resolution form 5 mV per bit to about 0.1875 millivolt bit or better?
The ADS1115 analog to digital converter may be the way to go.
It offers for analog inputs that can be configured to make single ended, differential, or comparator measurements.
Nothing more than the ADS1115 and your Arduino is required for this tutorial.
READ THIS ARTICLEArduino ADS1115 Differential Voltmeter Tutorial
Making a differential voltage measurement is among the ADS1115 capabilities.
At sixteen bits of resolution, I consider it worthwhile tool to have around.
This tutorial will also show you how you can make a negative voltage measurement with your Arduino.
Includes a sample sketch and hook up diagram,
READ THIS ARTICLE