1.3" SH1106 Blue OLED Display Arduino Tutorial
A Larger, Blue and Low Cost OLED for your Arduino
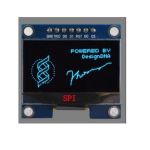
This particular OLED is a versatile low cost device that can be found readily online. At 1.3″, it is easier to read than the 0.96 inch variety.
When used with the U8glib library, you can pretty much display whatever it is you want to display in monochrome. In this case, your OLED color is blue. The display typically costs around 6 dollars.
This particular tutorial is intended to allow you to wire up your display, load a sketch and thus let you prove to yourself that it works. Once you become more familiar with U8glib, SPI, and/or I2C, you will be able to make modifications that better fit your project.
Getting This Display
I’ve identified a few vendors who sell this display on eBay. If the display appeals to you and want one that will work with this tutorial, you can try the following.
Arduino SH1106 Quick Start
You’ll Need the U8glib Library
Known as the Universal Graphics Library for 8-bit Embedded Systems, this is the cornerstone to many of the OLED projects that you find out there.
Important Note: The original U8glib library is no longer actively maintained. The author recommends using its successor, U8g2. While the U8glib code provided in this tutorial *might* still work if you find and install the older library, it's highly recommended to use U8g2 for new projects. For this conversion, we will stick to the original U8glib example, but be aware of this for future use.
To install the original U8glib (if needed):
- Download the library ZIP file from its archived download page (or search for "U8glib Arduino library download").
- In the Arduino IDE, go to Sketch > Include Library > Add .ZIP Library... and select the downloaded file.
You can also learn more about installing libraries from the official Arduino guide.
Connect the OLED to Your Arduino
Connect your OLED pins to your micro-controller as shown in the drawing and table below. This tutorial uses the SPI interface.

| OLED Pin | Arduino Pin | Function |
|---|---|---|
| GND | GND | Ground |
| VCC | 5V | Power (+3.3V to 5V) |
| D0 | Digital 4 | SPI Clock (SCK) |
| D1 | Digital 5 | SPI Data (MOSI) |
| RES | (Unconnected in sketch, try connecting to 5V if needed) | Reset |
| DC | Digital 7 | Data/Command Select (A0) |
| CS | Digital 6 | Chip Select (Slave Select) |
Upload This Sketch to Your Arduino
Simple, copy and paste it. This is just the graphics test that comes with the U8glib library. All I’ve really done is set up the constructor for you. I use this library example in my tests because it fully exercises the compatibility of the graphics library with your display.
/*
  Emre's Bench - SH1106 1.3" OLED Display Test
  Based on the U8glib GraphicsTest example
*/

// Include the U8glib library (ensure it's installed)
#include "U8glib.h"

// Initialize the U8glib library for the SH1106 display using Software SPI
// Pinout: SCK = 4, MOSI = 5, CS = 6, DC(A0) = 7, RST = (None)
// NOTE: Check your display's pin labels carefully. D0/D1 might refer to Clock/Data.
U8GLIB_SH1106_128X64 u8g(4, 5, 6, 7);

// Function to set up the drawing environment
void u8g_prepare(void) {
  u8g.setFont(u8g_font_6x10);             // Set the font
  u8g.setFontRefHeightExtendedText();     // Adjust reference height
  u8g.setDefaultForegroundColor();        // Set default color (white/blue on monochrome)
  u8g.setFontPosTop();                    // Set font positioning
}

// --- Drawing functions (from U8glib GraphicsTest example) ---

void u8g_box_frame(uint8_t a) {
  u8g.drawStr(0, 0, "drawBox");
  u8g.drawBox(5, 10, 20, 10);
  u8g.drawBox(10 + a, 15, 30, 7);
  u8g.drawStr(0, 30, "drawFrame");
  u8g.drawFrame(5, 10 + 30, 20, 10);
  u8g.drawFrame(10 + a, 15 + 30, 30, 7);
}

void u8g_disc_circle(uint8_t a) {
  u8g.drawStr(0, 0, "drawDisc");
  u8g.drawDisc(10, 18, 9);
  u8g.drawDisc(24 + a, 16, 7);
  u8g.drawStr(0, 30, "drawCircle");
  u8g.drawCircle(10, 18 + 30, 9);
  u8g.drawCircle(24 + a, 16 + 30, 7);
}

void u8g_r_frame(uint8_t a) {
  u8g.drawStr(0, 0, "drawRFrame/Box");
  u8g.drawRFrame(5, 10, 40, 30, a + 1);
  u8g.drawRBox(50, 10, 25, 40, a + 1);
}

void u8g_string(uint8_t a) {
  u8g.drawStr(30 + a, 31, " 0");
  u8g.drawStr90(30, 31 + a, " 90");
  u8g.drawStr180(30 - a, 31, " 180");
  u8g.drawStr270(30, 31 - a, " 270");
}

void u8g_line(uint8_t a) {
  u8g.drawStr(0, 0, "drawLine");
  u8g.drawLine(7 + a, 10, 40, 55);
  u8g.drawLine(7 + a * 2, 10, 60, 55);
  u8g.drawLine(7 + a * 3, 10, 80, 55);
  u8g.drawLine(7 + a * 4, 10, 100, 55);
}

void u8g_triangle(uint8_t a) {
  uint16_t offset = a;
  u8g.drawStr(0, 0, "drawTriangle");
  u8g.drawTriangle(14, 7, 45, 30, 10, 40);
  u8g.drawTriangle(14 + offset, 7 - offset, 45 + offset, 30 - offset, 57 + offset, 10 - offset);
  u8g.drawTriangle(57 + offset * 2, 10, 45 + offset * 2, 30, 86 + offset * 2, 53);
  u8g.drawTriangle(10 + offset, 40 + offset, 45 + offset, 30 + offset, 86 + offset, 53 + offset);
}

void u8g_ascii_1() {
  char s[2] = " ";
  uint8_t x, y;
  u8g.drawStr(0, 0, "ASCII page 1");
  for (y = 0; y < 6; y++) {
    for (x = 0; x < 16; x++) {
      s[0] = y * 16 + x + 32;
      u8g.drawStr(x * 7, y * 10 + 10, s);
    }
  }
}

void u8g_ascii_2() {
  char s[2] = " ";
  uint8_t x, y;
  u8g.drawStr(0, 0, "ASCII page 2");
  for (y = 0; y < 6; y++) {
    for (x = 0; x < 16; x++) {
      s[0] = y * 16 + x + 160;
      u8g.drawStr(x * 7, y * 10 + 10, s);
    }
  }
}

void u8g_extra_page(uint8_t a) {
    u8g.drawStr( 0, 12, "setScale2x2");
    u8g.setScale2x2(); // Activate 2x scale
    u8g.drawStr( 0, 6+a, "setScale2x2");
    u8g.undoScale();   // Deactivate 2x scale
}

// Global state variable for the graphics test animation
uint8_t draw_state = 0;

// Main drawing function called within the picture loop
void draw(void) {
  u8g_prepare(); // Set font and color
  switch (draw_state >> 3) { // Determine which test screen to draw based on draw_state
    case 0: u8g_box_frame(draw_state & 7); break;
    case 1: u8g_disc_circle(draw_state & 7); break;
    case 2: u8g_r_frame(draw_state & 7); break;
    case 3: u8g_string(draw_state & 7); break;
    case 4: u8g_line(draw_state & 7); break;
    case 5: u8g_triangle(draw_state & 7); break;
    case 6: u8g_ascii_1(); break;
    case 7: u8g_ascii_2(); break;
    case 8: u8g_extra_page(draw_state & 7); break; // Added the missing case from the original sketch logic
  }
}

void setup(void) {
  // Optional: if the display is mirrored or upside down, uncomment one of these:
  // u8g.setRot180();
  // u8g.setRot270();
  // u8g.setRot90();

  // Added Serial.begin for potential debugging, though not used in this example
  Serial.begin(9600);
}

void loop(void) {
  // U8glib picture loop
  u8g.firstPage();
  do {
    draw(); // Call the main drawing function
  } while (u8g.nextPage());

  // Increment the state to cycle through the different test screens
  draw_state++;
  if (draw_state >= 9 * 8) { // Adjusted the limit to include the extra_page case
    draw_state = 0;
  }

  // Short delay between frames (optional)
   delay(100); // Reduced delay from original comment for smoother animation
}