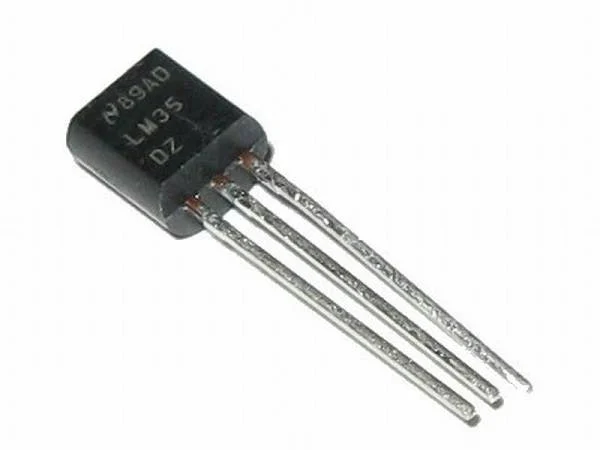
LM35 Arduino Temperature Sensor User Manual
Better than the TMP36?
The LM35 temperature sensor is a lot like the TMP36, except that is typically a little less expensive and a tad easier to code for. It is also a little more accurate.
About the only real drawback is that you have to measure negative voltages if you want to measure below 0 degrees C.
Power Requirements
The device is powered anywhere from 4 to 30 Vdc (Note: Original source said 40V, but datasheet usually states 30V max). When used with your Arduino, you will want to use the 5V output.
Accuracy
According to the manufacturer, the accuracy is typically +/- 0.5 degrees C at room temperature and +/- 1 degree C over the full range. (Note: Original source mentioned 0.75C typical / +/- 1C worst-case).
The Range
The device has a range from -55 degrees C to +150 degree C (or -67 to 302 degrees F).
In most applications using a simple Arduino setup (like the one shown), you’ll probably want to be using this from 0 to 150 degrees C as going below 0°C requires measuring negative voltages relative to ground or using a different circuit configuration.
If you do need to easily measure below zero C, I recommend the TMP36. It’s a hell of lot easier to implement for lower temperatures with a simple setup.
The Output (or Scale Factor)
There is no offset for the LM35 relative to Celsius. Zero millivolts represents zero degrees C (or 32 F).
Every degree C of change from zero will increase the output voltage by 10 mV (the scale factor).
Therefore a temperature of 110 degrees C will yield an output of 1100mV (1.1V).
The LM35 Pinouts
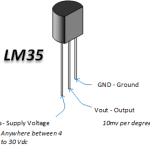
The sketch to the left identifies the pins of the LM35 (TO-92 package, viewed from the front/flat side):
- Pin 1 (Left): +Vs (Connect to 4V-30V, typically 5V from Arduino)
- Pin 2 (Center): Vout (Connect to Arduino Analog Pin)
- Pin 3 (Right): GND (Connect to Arduino GND)
Tutorial
Connecting the Arduino
Pretty simple stuff here. You just connect it as shown below.
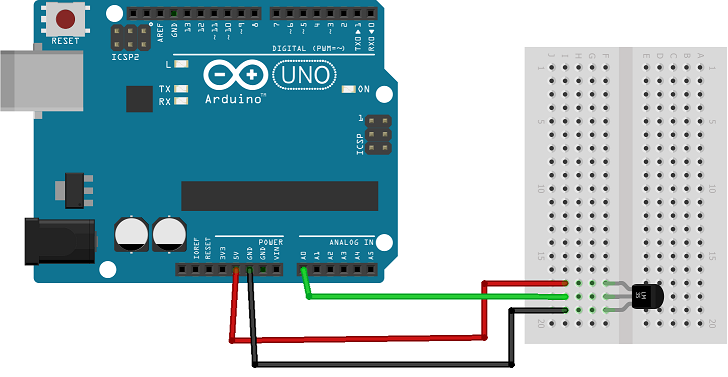
Correct Connections:
- Connect LM35 Pin 1 (+Vs) to Arduino 5V.
- Connect LM35 Pin 2 (Vout) to Arduino Analog Pin A0.
- Connect LM35 Pin 3 (GND) to Arduino GND.
The Sketch
Just copy and paste this into your Arduino IDE to see it work.
/*
 Emre's Bench - LM35 Thermometer Tutorial
 Reads temperature from an LM35 sensor and prints it to the Serial Monitor.
*/

const int analogIn = A0; // Analog pin connected to the LM35 Vout (center pin)

int RawValue = 0;       // Variable to store raw ADC reading
double Voltage = 0;     // Variable to store voltage in millivolts
double tempC = 0;       // Variable to store temperature in Celsius
double tempF = 0;       // Variable to store temperature in Fahrenheit

void setup() {
  // Initialize serial communication
  Serial.begin(9600);
}

void loop() {
  // Read the raw analog value
  RawValue = analogRead(analogIn);

  // Convert the raw ADC value (0-1023) to millivolts (0-5000mV)
  // Assumes Arduino Vref = 5.0V (5000mV)
  Voltage = (RawValue / 1024.0) * 5000.0; // Use 1024.0 for float division

  // Convert millivolts to temperature Celsius (LM35 scale factor is 10mV/°C)
  tempC = Voltage / 10.0;

  // Convert Celsius to Fahrenheit
  tempF = (tempC * 9.0 / 5.0) + 32.0; // Use floating point for calculation (9.0/5.0 = 1.8)

  // Print the results to the Serial Monitor
  Serial.print("Raw Value = ");
  Serial.print(RawValue);

  Serial.print("\t Millivolts = ");
  Serial.print(Voltage, 0); // Print millivolts with 0 decimal places

  Serial.print("\t Temp C = ");
  Serial.print(tempC, 1); // Print Celsius with 1 decimal place

  Serial.print("\t Temp F = ");
  Serial.println(tempF, 1); // Print Fahrenheit with 1 decimal place

  // Wait 500 milliseconds before the next loop
  delay(500);
}